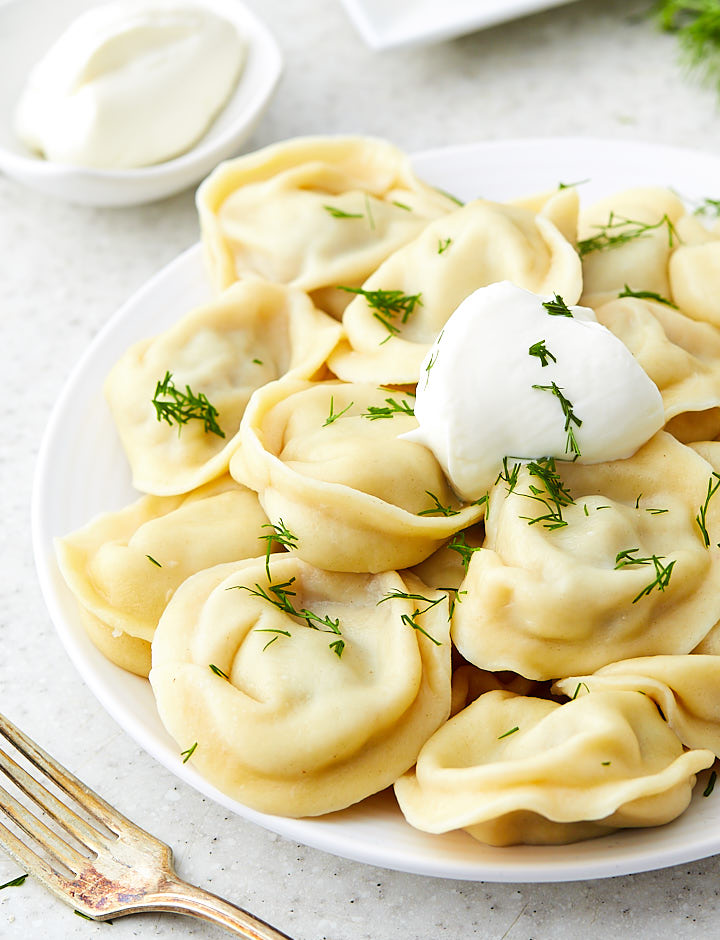
Let me share something very special to me today, a traditional Russian pelmeni recipe. This recipe has been in my family for generations. With a few tips along you can make pelmeni that are very flavorful and explode with tasty juices as you bite into them. That's how they are supposed to be: plump, meaty, flavorful and filled with tender and juicy meat filling.
Making pelmeni is a bit laborious, that's why I haven't been making them that often... rarely, actually. Well, all that has changed recently with the acquisition of a pasta roller attachment for my KitchenAid stand mixer. I wrote about it in the Sesame Crackers post.
I've been thinking of getting one for a long time but could not justify the expense. Little by little I've accumulated enough recipes that would really benefit from a motorized pasta roller so it became a no-brainer. And, boy, does it help making the dough for pelmeni a breeze! As much as the stand mixer itself is helpful with mixing stiff pasta, sambusa or pelmeni dough.
The quality of pelmeni directly depends on the dough and the filling. Everything must be right to give you the best eating experience. How you make pelmeni also make a huge difference. Let me share a few tips that will help you make the best pelmeni ever.
The dough
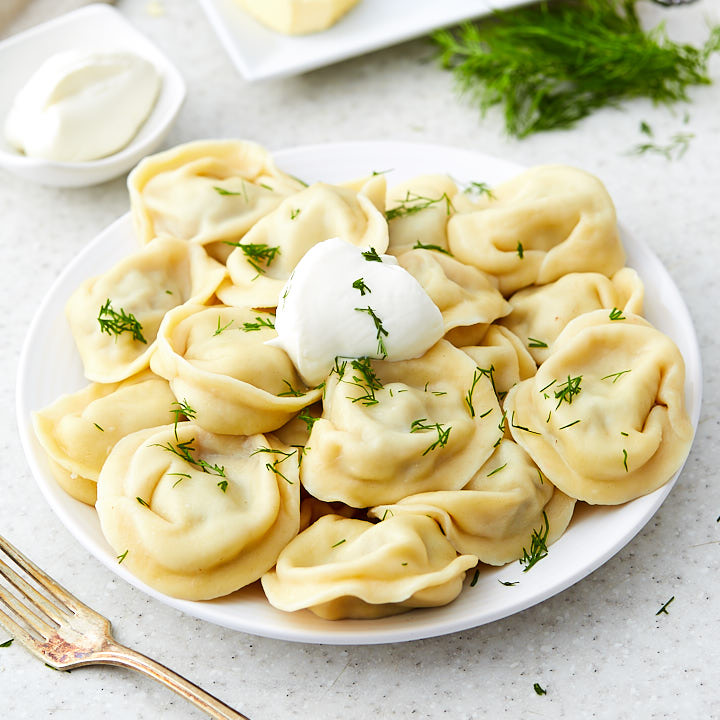
The dough should be very stiff. Stiff dough is easier to roll out thin. Stiff dough does not require much flouring, if any, during rolling out. No flour helps create a much better seal when you make pelmeni. A good seal is very important. It will mean that no water during boiling will get in and ruin the filling. Most importantly, the awesome flavorful juices will stay inside for you to enjoy them.
Stiff dough also holds its shape better, and the pelmeni come out looking plump and shapely. I could just eat them with my eyes. They are gorgeous.
I see many modern recipes that call for soft dough and that results in many problems. Soft dough is very hard to roll out thin without tearing. Thick dough throws the taste out of balance. Then you will also have poor seals. Soft dough needs flouring to prevent sticking. The flour will result in a poor seal here and there, you won’t even notice it. The result is a pelmen (singular for pelmeni) that falls apart during boiling, or lets some water in and has it’s filling ruined.
The meat filling
Traditional plemeni are made with a 50/50 mix of pork and beef. Sounds simple enough, but there is more to it. Just like a perfect burger that needs to have the right cut of beef and the right amount of fat, great pelmeni are a result of proper meat selection. My grandma always used beef shoulder (chuck) and pork butt when she could. Her pelmeni were famous. I do the same and use a 50/50 mix of chuck and pork butt. I also add a little bit of trimmed off fat back in the mix, this way I can control the fat content better.
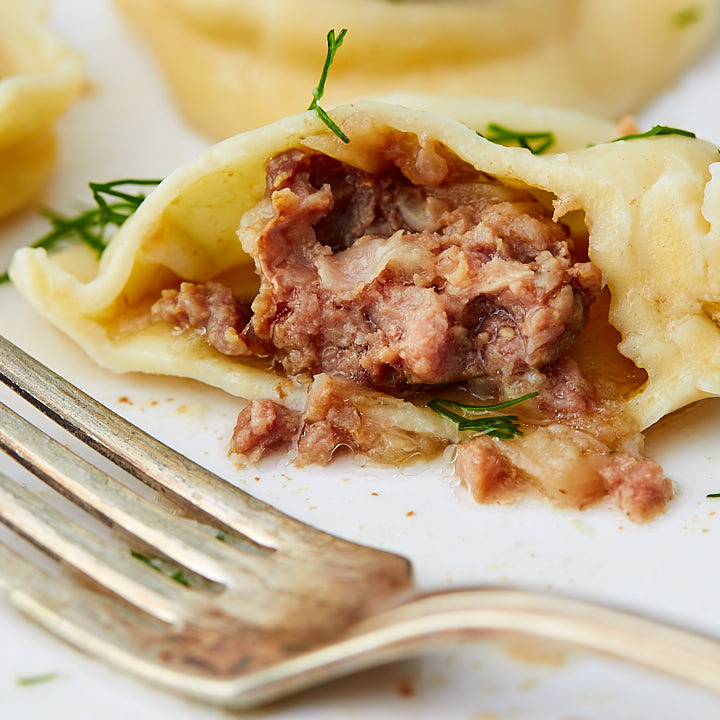
Oh, almost forgot. The beef and the pork, no matter how good or fatty won’t make a great filling. You need to add raw onions into the mix. The onions add a little sweetness and, most importantly, a lot of moisture. Just like they do in Uzbek Sambusa meat filling. It’s primarily the onions that make the meat filling so moist and juicy, and don't let it turn into a rubbery meat ball.
In the end, you will be rewarded with the juiciest, the softest, the most flavorful meat filling imaginable.
Again, I’ve seen some modern recipes that suggest adding sautéed onions into the filling for better flavor, but that’s counterproductive. Sauteed onions have lost most of their water during cooking and won't be able to release it into the pelmeni filling. It's better to add caramelized onions on top of pelmeni when serving, though this is more commonly done with pierogi.
The process
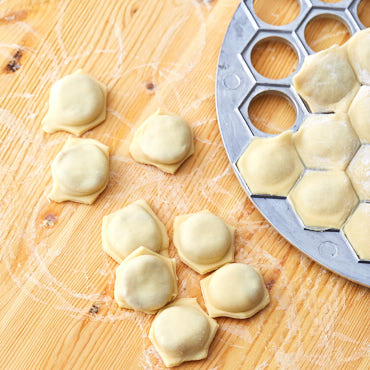
There is not much to add here. You can shape pelmeni by hand or use a pelmeni mold. But as they say, pelmeni don't like mechanized production. I've tried both. My preferred way is to hand shape them. There isn't much saving in time considering the time you spend fiddling with the mold which is not as simple to use as it looks. Plus the tiny size and the non-traditional shape. They just don't have the same mouth feel. Perhaps it's because of the skewed dough to meat ratio.
Whatever you do, make sure you seal the pelmeni really well. How they look is of lesser importance.
Finally, pelmeni making is not a one person job. It's a family thing. One person is rolling out the dough and cutting out the circles, another person or two are adding the filling and shaping them makes things super fast and enjoyable.
Ingredients
For the dough
- 350 g bread flour
- 120 g water
- 6 g kosher salt
- 1 egg
For the meat filling
- 200 g pork butt ground on a medium plate
- 200 g beef chuck ground on medium plate
- 25 g pork fat trimmed from pork butt, ground on medium plate
- 2 small yellow onions each about 100 g or 3.5 ounces, ground or finely chopped
- 6 g kosher salt I like using pink Himalayan salt, it tastes great
- 1/4 tsp freshly ground black pepper
Instructions
- To prepare the dough, sift the flour into a bowl. They say that sifting the flour makes for better pelmeni dough. Make a hole in the center of the flour. Pour the salted water and a slightly beaten egg. Mix until all the flour is incorporated. The dough will be quite stiff. Using a stand mixer fitted with a dough hook will make the job very easy though. As the dough is stiff, watch your mixer very closely. If your mixer isn't powerful enough and struggles, it's better to finish by hand.
- Cover the dough and let it rest for 30 minutes or longer. I like to refrigerate my pelmeni dough for 2-3 hours before using it.
- Meanwhile, prepare the meat filling by combining the beef and pork meat, fat, onions, salt and pepper.
- Roll the dough out about 2 mm thick, #4 on the Kitchen Aid pasta roller attachment. Cut into 3-3.5" circles.
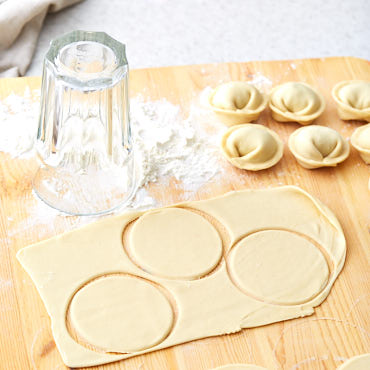
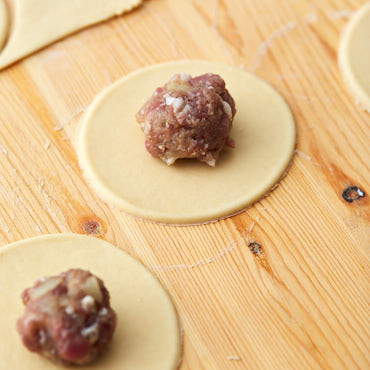
- Fill each circle with 16 g of meat filling (1 heaping Tbsp).
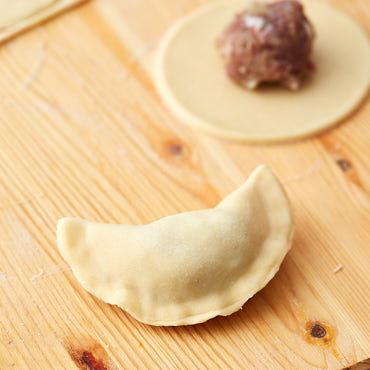
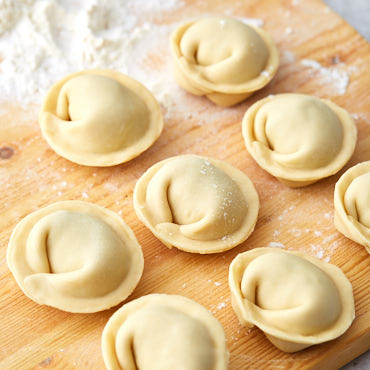
- Fold the circle in half and crimp well.
- Bring the ends together and crimp.
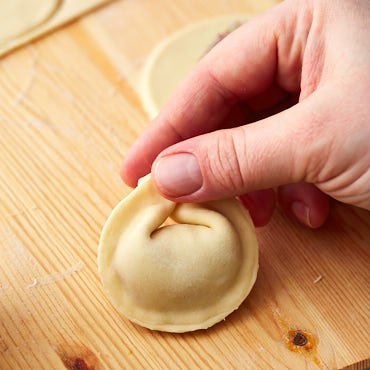
- Set aside. It's best to refrigerate or freeze finished pelmeni before you are ready to boil them.
- Alternatively, use a pelmeni mold.
- Bring water to rolling boil in a large pot over high heat. Drop pelmeni into boiling water. Wait till it starts to boil again, turn the heat to medium, and cook for 8 minutes or a little longer for softer dough. The total time from dropping into water to removing is about 16 minutes.
- Remove from the water, drain and gently toss with a little bit of butter to prevent sticking. Serve immediately with sour cream, chopped fresh dill and a saucer filled with vinegar. Yes, pelmeni are fantastic with sour cream and a little bit of vinegar. I love using malt vinegar for pelmeni.
Notes
Nutrition


mary vincent says
I I happened upon your crispy wing recipe which sounded good and read all of the many comments,all of which raved. It led me to your blog. there I found a recipe for pelminiI am not Russian. I am American lithuanian. The recipe is exactly the same as our recipe for kooldunai.even down to cook for 8 minutes. My mom used to say that and we laughed. Why not 5 or 10? which seemed more logical.so when I saw 8 mins..I thought this guy knows his stuff. Even your explanation about the raw onion and the unique juice it creates when it mixes with the meat juices. nothing else like it. The only thing missing was you had to pinch the edges to insure a tight seal. so looking forward to your authentic recipes which I am sure will be outstanding.
victor says
Enjoy!
Renata says
Perfection! I don't know why so many other recipes I found online try to complicate the dough recipe by adding a bunch of different random ingredients to it. So glad I found this one! Thank you!
victor says
Happy to hear it, Renata. Enjoy!
Ciara says
First time making Russian pelmeni and they turned out really good, better than any store-bought I've ever tried. Thanks for sharing the recipe!!!
victor says
You are very welcome!
Anastasia says
Thank you for the recipe! We are going to use it to prepare Pelmeni for week before Maslenitsa!
Since we need to make a lot, could you tell me how many Pelmeni are out of this proportions?
victor says
I get about 20 from this recipe. Never enough;-)
KM says
Okay I just made these. I gotta tell you. Both dough and meat fillings were so yummy. Husband really liked it. He said these were way better than the frozen ones from the Eastern Euro markets. I am so glad I came upon your recipe for pelmeni.
victor says
Glad to hear that. No comparison to frozen ones.
Lili says
Victor, I'm seriously in love with this dough. Would you use the same dough for vareniki?
victor says
Lol, you and me both. I love it too. I use it to make vareniki as well, it works wonderfully.
kay says
Hi there,
I am so interested in trying these, i am just waiting to get the proper meats to get a great filling. I always prefer to make a big batch of dough if I am going to be making a dough.. Besides vareniki is this dough used in anything else? Would you be able to describe this dough to any other dough you might happen to know of from a different cuisine? I am just trying to get an idea of the texture you know?
I like having things like this in the freeze for me and my daughter. An easy meal to pop in some boiling water and have a meal or part of a meal already prepared to go.
Thanks for sharing your recipes!
victor says
You are very welcome. This dough recipe is somewhat similar to your average dumpling dough. If you roll it out thinner, you can use it for dumplings. This dough is sumilar Gerorgian Khinkali dough recipe and also somewhat similar to Uzbek cheburek dough but there are small difference. If you think about, it's the same flour, water, egg and salt in most of dumpling/khinkali/cheburek/pelmeni/pierogi recipes, the difference is hydraiton level and the amount off egg. Happy cooking!
Lili says
Perfect dough! Handles great, seals well, looks great boiled. I’m in love. I made chicken and fontina filling. Tasty!
victor says
Asya, pelmeni dough is just like pasta - the longer you cook it the softer it becomes as it absorbs more water. It's hard to know what you mean by 'chewy', but I'd say it's not any chewier than pasta. Both have very similar texture. Very soft dough that is not chewy won't work for pelmeni as it will disintegrate during boiling. If your dough is stiff it's possible that it dried out, or it wasn't hydrated enough from the beginning. Sometimes what flour you use may have an impact. Try adding a little more water next time. I use King Arthur all-purpose flour with this recipe and it works great with the measurements that I provided.
As to freezing, no, they don't need to be frozen. You can freeze if you want to cook them later otherwise it's not necessary.
Asya says
I weighed my ingredients, but left the dough to sit in the fridge overnight. The next day, after coming to room temp, the dough was very, very stiff. The final pelmeni after boiling were a little al dente/chewy and tough. I am wondering if I should have boiled longer or if it the dough had dried out a little overnight. I also don't want to waste a batch and next time boil them longer just to find out boiling longer makes them even chewier. Basically, if I boil them longer, should I expect the dough to become softer (like overdone pasta) or chewier?
Also, is freezing necessary before boiling? Can I boil without freezing at all?
Many thanks for your help!!!!
Nadia Van Kirk says
I make them the way my grandmother did, except my husband likes spicy italian sausage instead of pork. I make about 200 at a time, takes me about 3 1/2 hours. Freeze them and then cook them for a quick and simple meal. I like soy sauce and sour cream. My husband, likes them in chicken broth with mixed veges.
Lee says
About the filling, do you just combine all ingredients and that's it, the meat is not cooked first?
victor says
That's right, the meat is raw. It will get cooked just fine when you boil pelmeni.
Polina says
Ah, these are just like my Russian grandma used to make. I've been looking for a good recipe for a while and this is it. The dough is just perfect, it doesn't turn into mush and fall apart during cooking.
Anna says
I love Russian pelmeni dumplings. I used to buy them from local Eastern European grocery stores, but I found that quality really varied from place to place, so I started making them myself. This is the best recipe I've tried, and I tried about a dozen, These dumplings are way better than the store-bought. Totally worth the effort. My husband loves them. I also used a Kitchen Aid pasta roller attachment, which made the whole process seem quite easy.
victor says
Glad you liked my recipe. Thank you for the feedback!